Our Services

100% Secure Payment
Customer Data Protected

Guaranteed Return
14 Days to Return Your Order

Expert Support
Personalised Attention

Fast Delivery
Shipping Across Europe
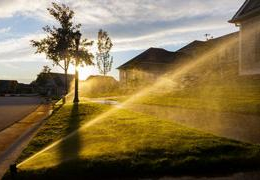
STEPS TO CREATE AN AUTOMATIC IRRIGATION SYSTEM
Automating an irrigation system provides many advantages for maintaining our gardens. Watering our gardens is one of the most common tasks we perform daily to keep our homes tidy.
In specific gardening and farming practices, watering is one of the most important ways to maintain the optimal and balanced health of our gardens. A modern, automated irrigation system can guarantee this action immediately and consistently.
This will allow you to organize and distribute your time for other more important activities while the system does its work. This way, you can ensure the health of your plants, with sufficient, adequate, and effective irrigation for the maintenance of your garden, all automatically.
If you don't have enough time to take care of your garden, an automatic irrigation system may be the best option for you.
Steps to implement an irrigation system
Measuring water pressure:
Add a pressure gauge to the key and open it fully.
Calculate water pressure by opening the tap over a bucket of water while measuring the time it takes to fill the bucket (seconds).
Then, divide the time it takes to fill the bucket (seconds) by the bucket's contents (liters). This gives you the incoming water flow, expressed in liters per second (l/s).
Make the garden trenches
Depending on the pipes to be installed in the system, trenches must be dug to then lay the system's pipes. Each trench should be slightly wider and deeper than the pipes to be used.
Divide the garden into different sectors
These sectors are called circuits. This is done to make it much easier for the programmer to manage and operate the system. Circuits allow the programmer to organize the system in a functional and efficient manner.
These circuits, in turn, distribute water to the sprinklers that will distribute water throughout the garden. Before managing the circuits, the valves must be connected using HE terminals on each side, with PVC pipes, one to the circuit and the other to the other valves.
Manage the circuits
At this point, we must install and coordinate each sprinkler for each circuit. Each sprinkler must be attached to the pipe with an adhesive specific to the pipe material.
The placement of sprinklers will depend on the type of garden, its size, and its system. Each garden has its own characteristics. Regardless, we recommend measuring the height of each sprinkler before digging the garden trenches.
If the height of these is not measured beforehand, the trench can be made too deep and cover the sprinklers, thus preventing the irrigation system from being activated.
Program the system
Finally, after the sprinklers are installed next to the circuits, the valves must be connected to the timer to automate the system. The timer will set the water pressure, along with the specific days and times for automatic activation.
Fill the trenches
Finally, fill the trench spaces with the soil removed to install the pipes. After this final step, the irrigation system would be fully operational.
Related posts
-
 How to install an irrigation diffuser or sprinkler?
Once you've laid the main line throughout your yard according to your plans, equipped with the valves and piping you...
How to install an irrigation diffuser or sprinkler?
Once you've laid the main line throughout your yard according to your plans, equipped with the valves and piping you... -
 How to choose the best kennel for your dog
Provide your pet with a decorative, safe, and efficient kennel that allows them to sleep, rest, and be protected.
How to choose the best kennel for your dog
Provide your pet with a decorative, safe, and efficient kennel that allows them to sleep, rest, and be protected. -
 How to choose the best fertilizer for your garden
Choose the best fertilizer for the health and growth of your garden plants.
How to choose the best fertilizer for your garden
Choose the best fertilizer for the health and growth of your garden plants. -
 RAIN BIRD ESP-RZX INDOOR AND OUTDOOR IRRIGATION PROGRAMMER REVIEW
If you are If you're a gardening enthusiast, you should choose a good irrigation controller that can keep your lawn...
RAIN BIRD ESP-RZX INDOOR AND OUTDOOR IRRIGATION PROGRAMMER REVIEW
If you are If you're a gardening enthusiast, you should choose a good irrigation controller that can keep your lawn... -
 10 Most Recommended Types of Irrigation Sprinklers
When you need irrigation sprinklers , choose one that sends large droplets of water close to the ground. These...
10 Most Recommended Types of Irrigation Sprinklers
When you need irrigation sprinklers , choose one that sends large droplets of water close to the ground. These... -
 What should you do if your lawn is always dry?
Now that summer is over and fall is beginning, you may notice that the long, hot days have taken a toll on the...
What should you do if your lawn is always dry?
Now that summer is over and fall is beginning, you may notice that the long, hot days have taken a toll on the...
Leave a comment